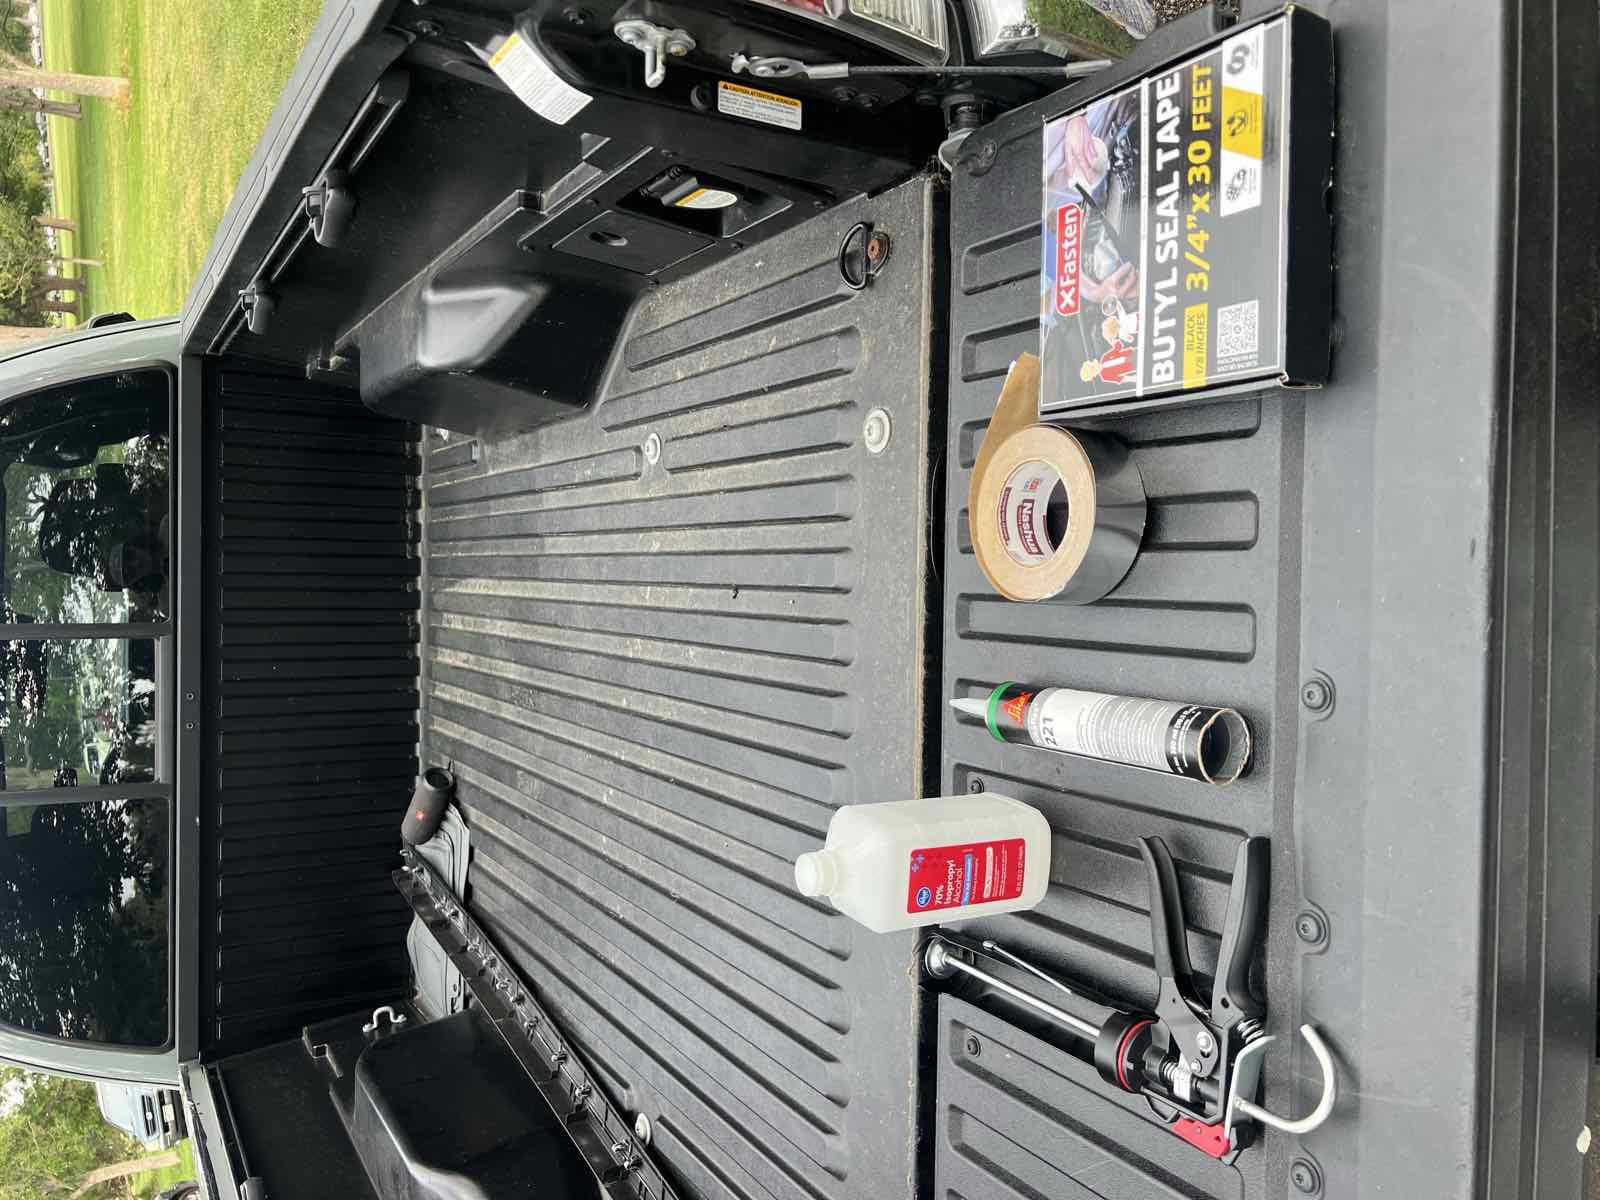
Do you actually need to do this?
If your camper mounts to the bed rails, yes. The M1 does. Water and dust getting past the rails is a bed problem, not a camper problem, and once the camper is bolted on top, you can't reach the rail caps again without pulling the whole thing off the truck. This is the definition of a job you do once, up front, or not at all.
The whole thing is a weekend of cheap materials and a couple of hours of actual work. Here's exactly what I did, in order, with the two spots I'd do differently.
What do you need to seal a Tacoma bed?
Everything in that first photo, and nothing exotic: a roll of aluminum foil tape, Sikaflex 221 sealant (not 252, more on that below), butyl seal tape, a caulk gun, 70% isopropyl alcohol, paper towels or a clean rag, and gloves. Full sourcing is at the bottom.
Sealing the rail caps (the headline job)
The plastic caps that run along your bed rails pop off to reveal a row of open holes underneath. Take them off by wiggling side to side as you pull up. The retaining clips are plastic, they snap if you just yank, and replacement caps aren't cheap.
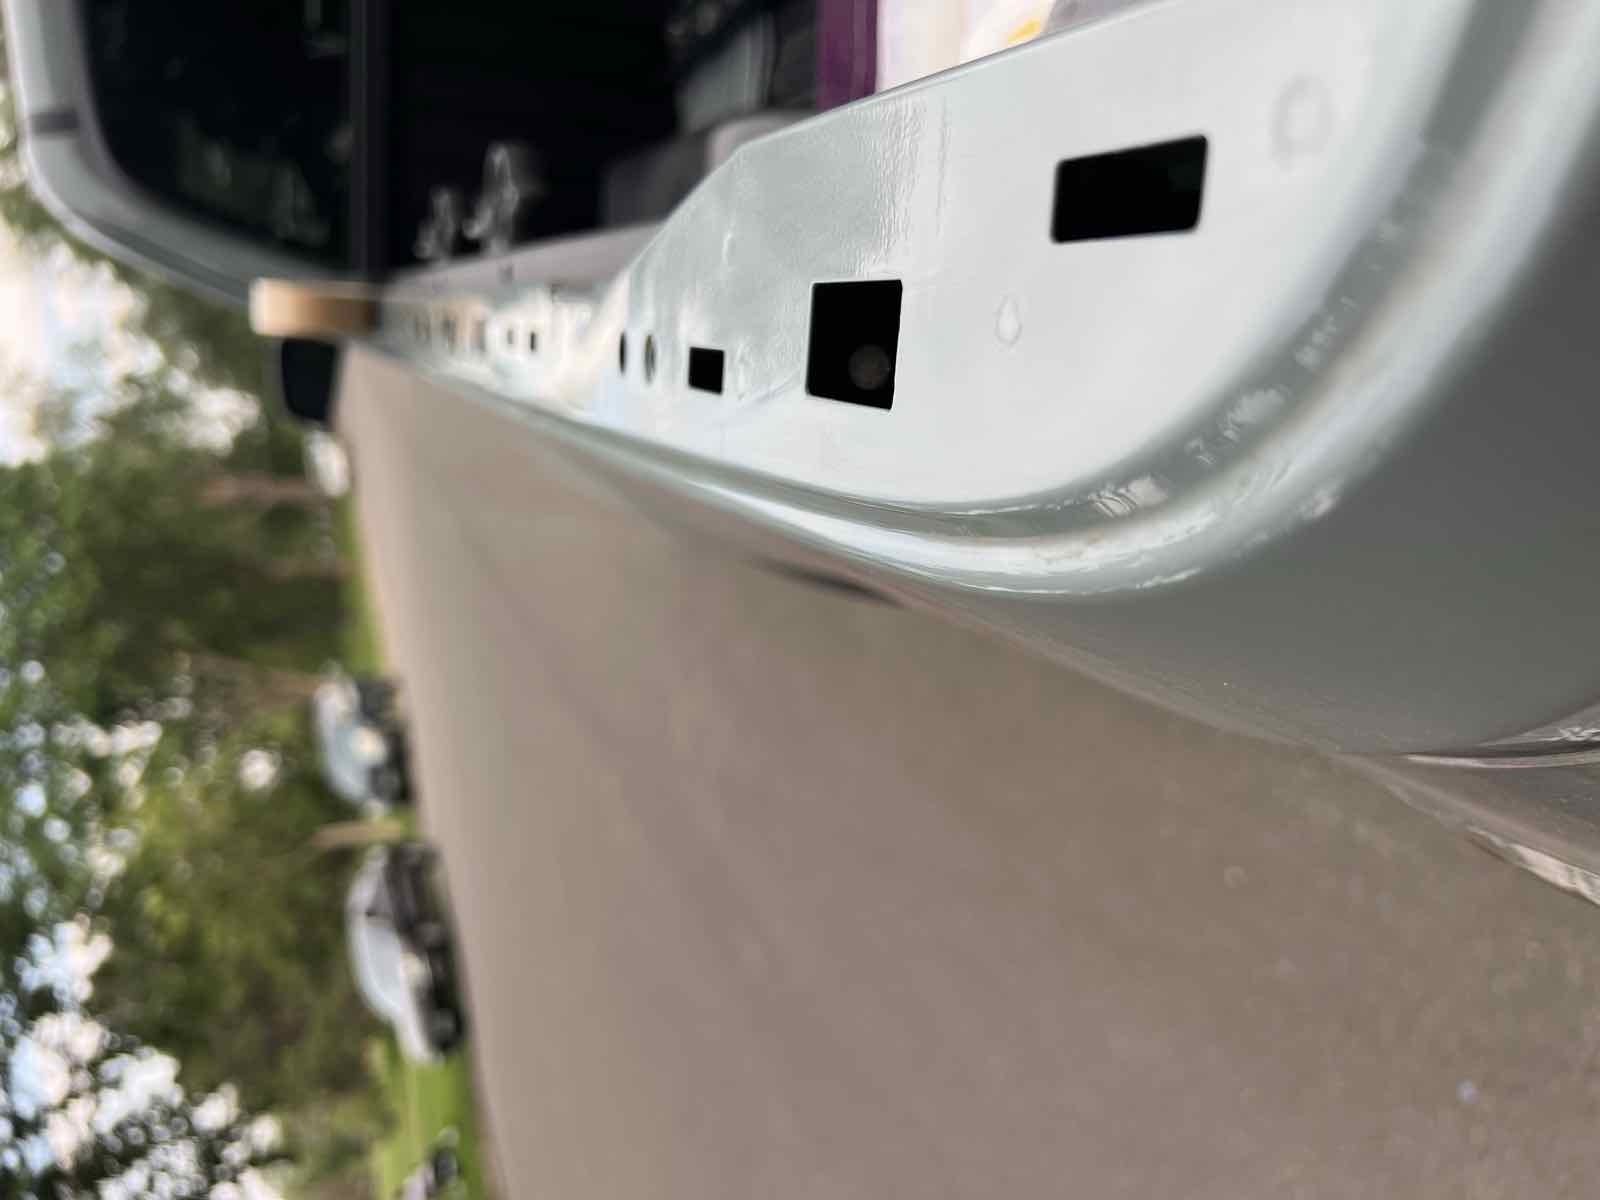
Before you tape anything, wipe the whole exposed rail down with isopropyl alcohol and a rag. There's road grime under those caps, and both the foil tape and the Sikaflex grip a clean, oil-free surface far better than a dirty one. Give it a minute to flash off before you start.
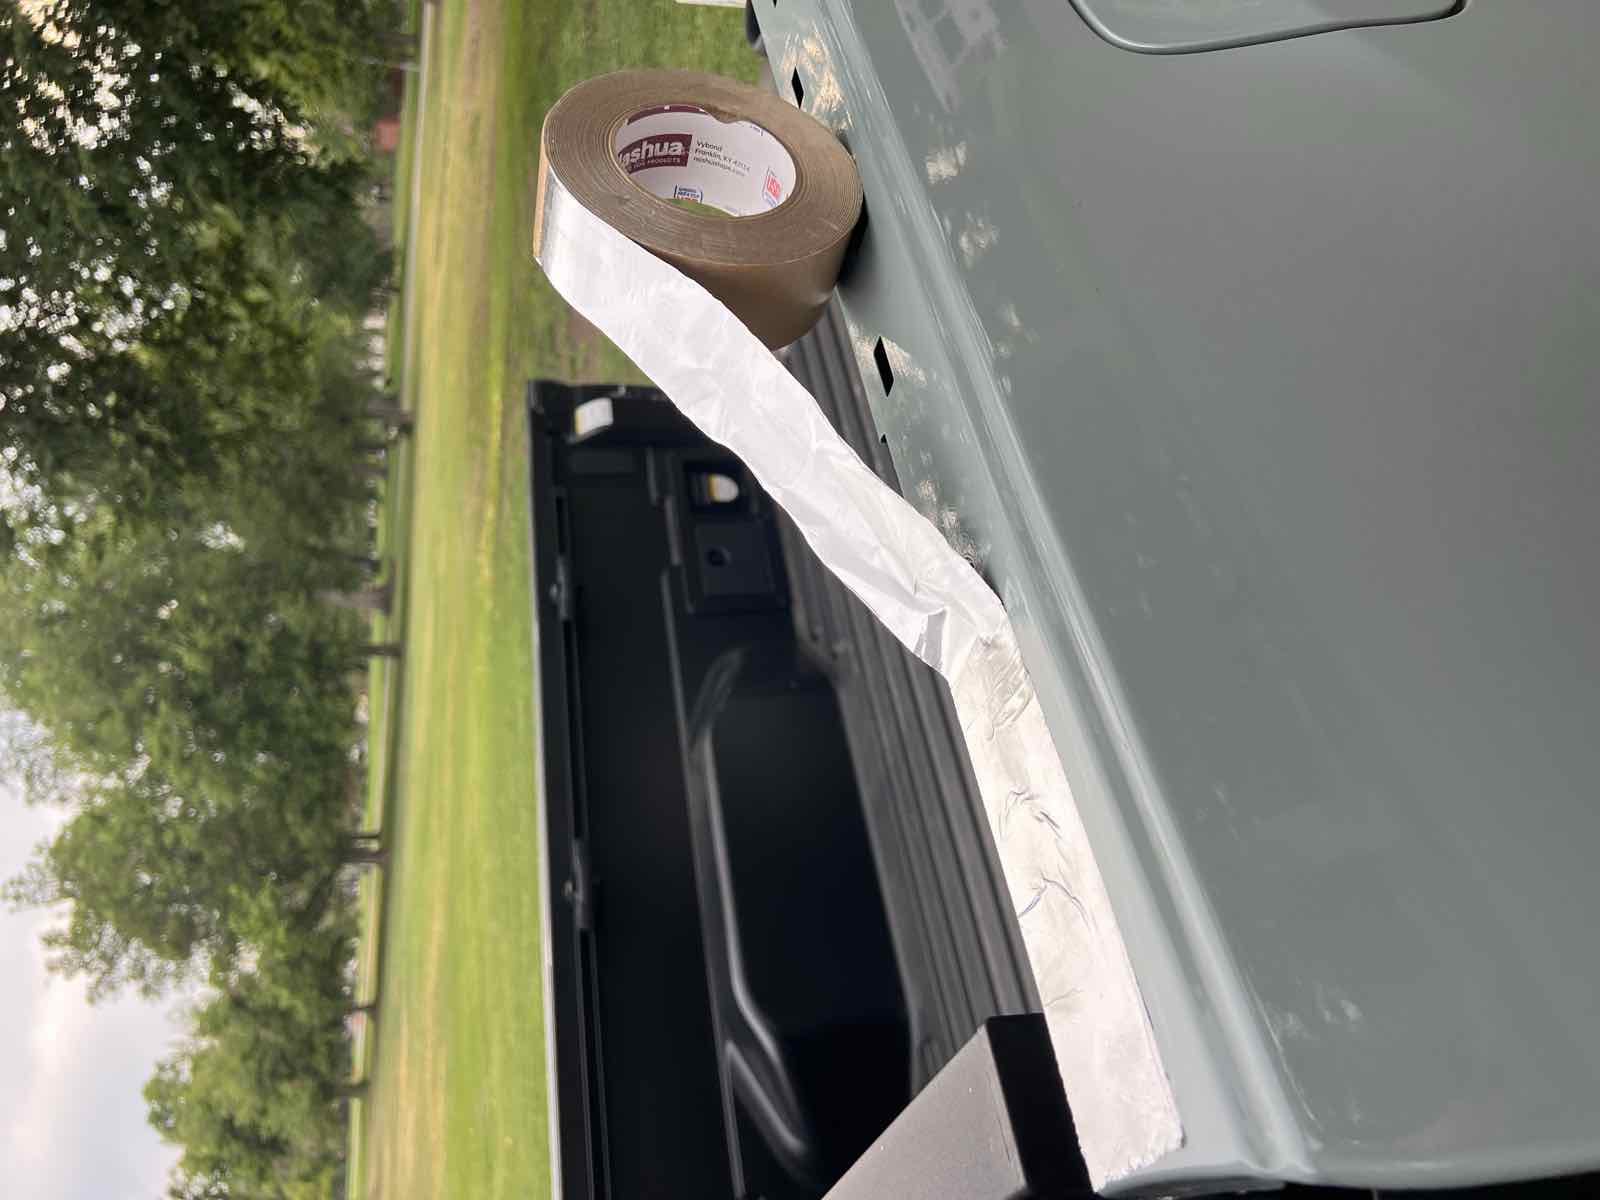
Cover the holes with aluminum foil tape, and keep it inside the footprint of the cap so none of it shows when the cap goes back on (exposed foil looks rough and is a pain to peel later). Side to side it's easy to eyeball how far to go. The two spots to watch are the ends, the front near the cab and the tailgate end, where the foil can peek out past the cap. Don't run it too far out there, just cover the hole enough.
Then a bead of Sikaflex 221 around the clip points and over the holes, on top of the foil. Keep it thin. Too much and it gushes out, and worse, it holds the cap proud so it won't seat flush. Full disclosure: the bead in these photos and the clip is a little thick. Go thinner than what you see here.
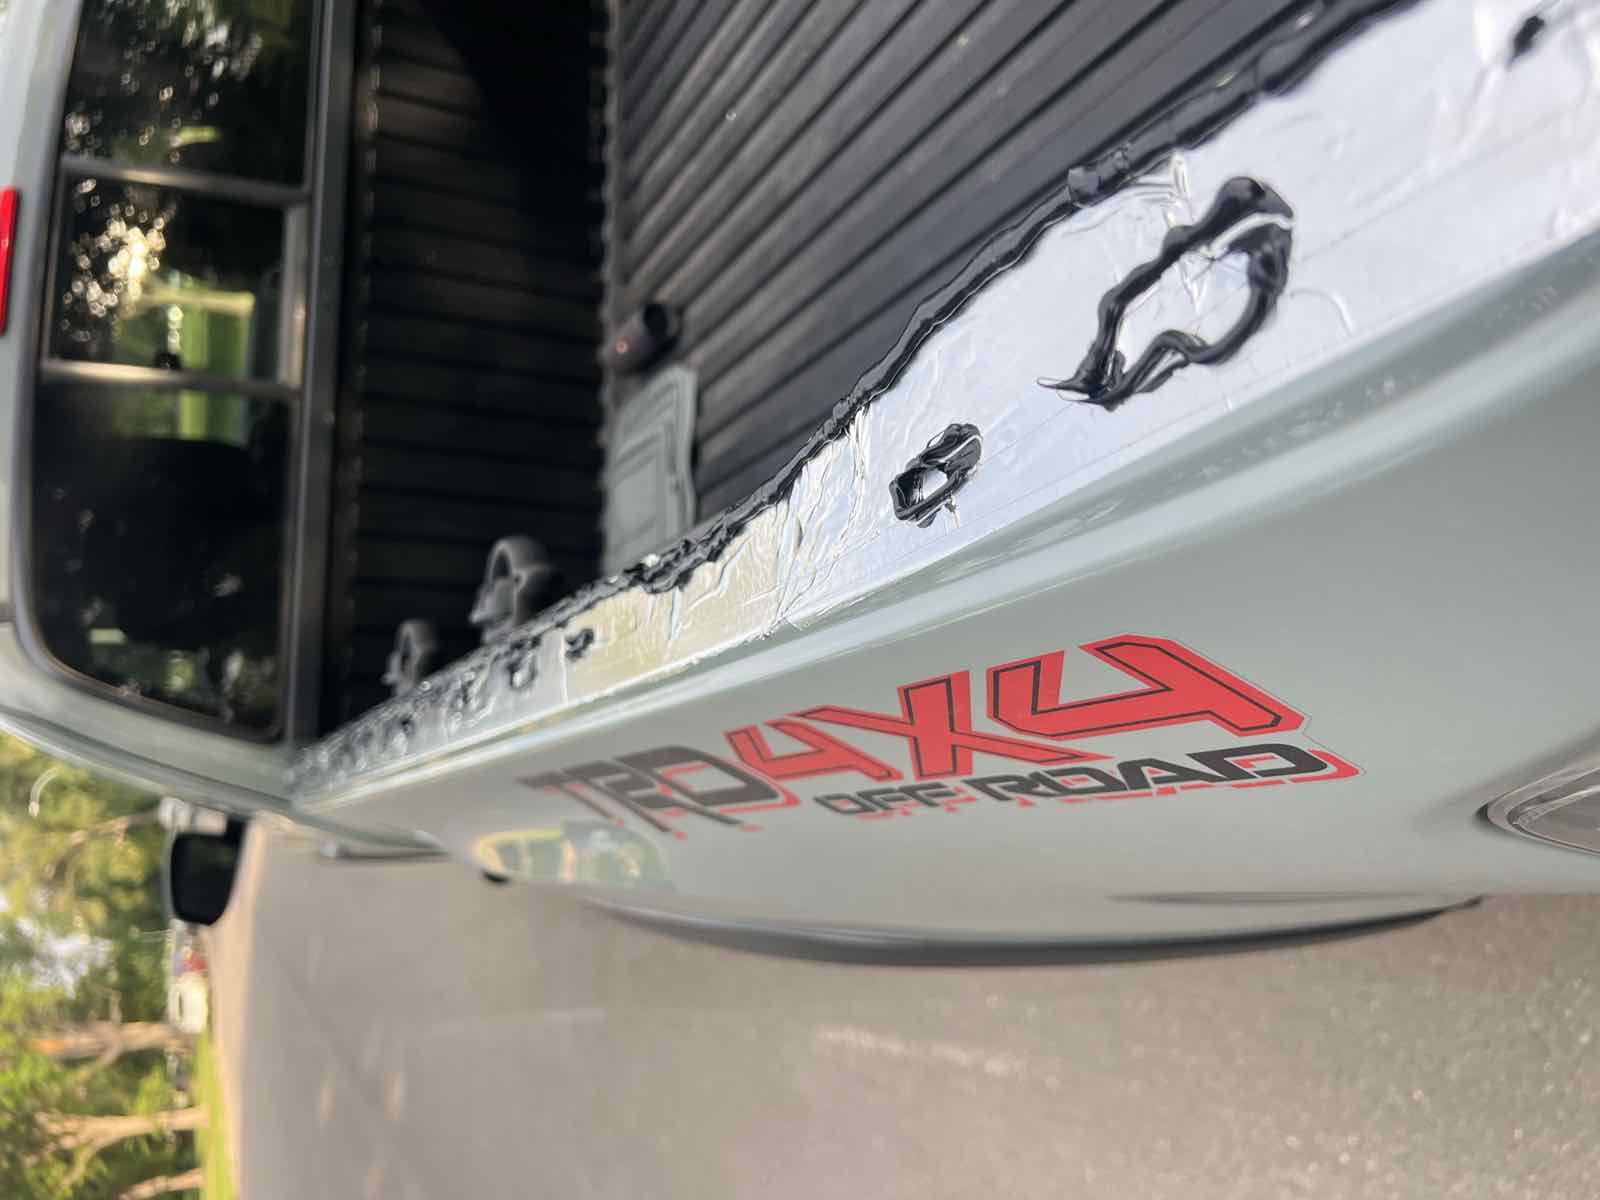
Reinstall each cap one clip at a time, working from the back end of the bed near the tailgate. Hold the rest of the cap up at an angle so only the clip you're seating drops into its hole, get that one aligned and fully home (a tap with a rubber mallet helps), then move to the next. Don't press the whole cap down at once, because that misaligns the hooks and leaves you with a proud cap. Speaking of which, here's what happens if you get greedy with the sealant:
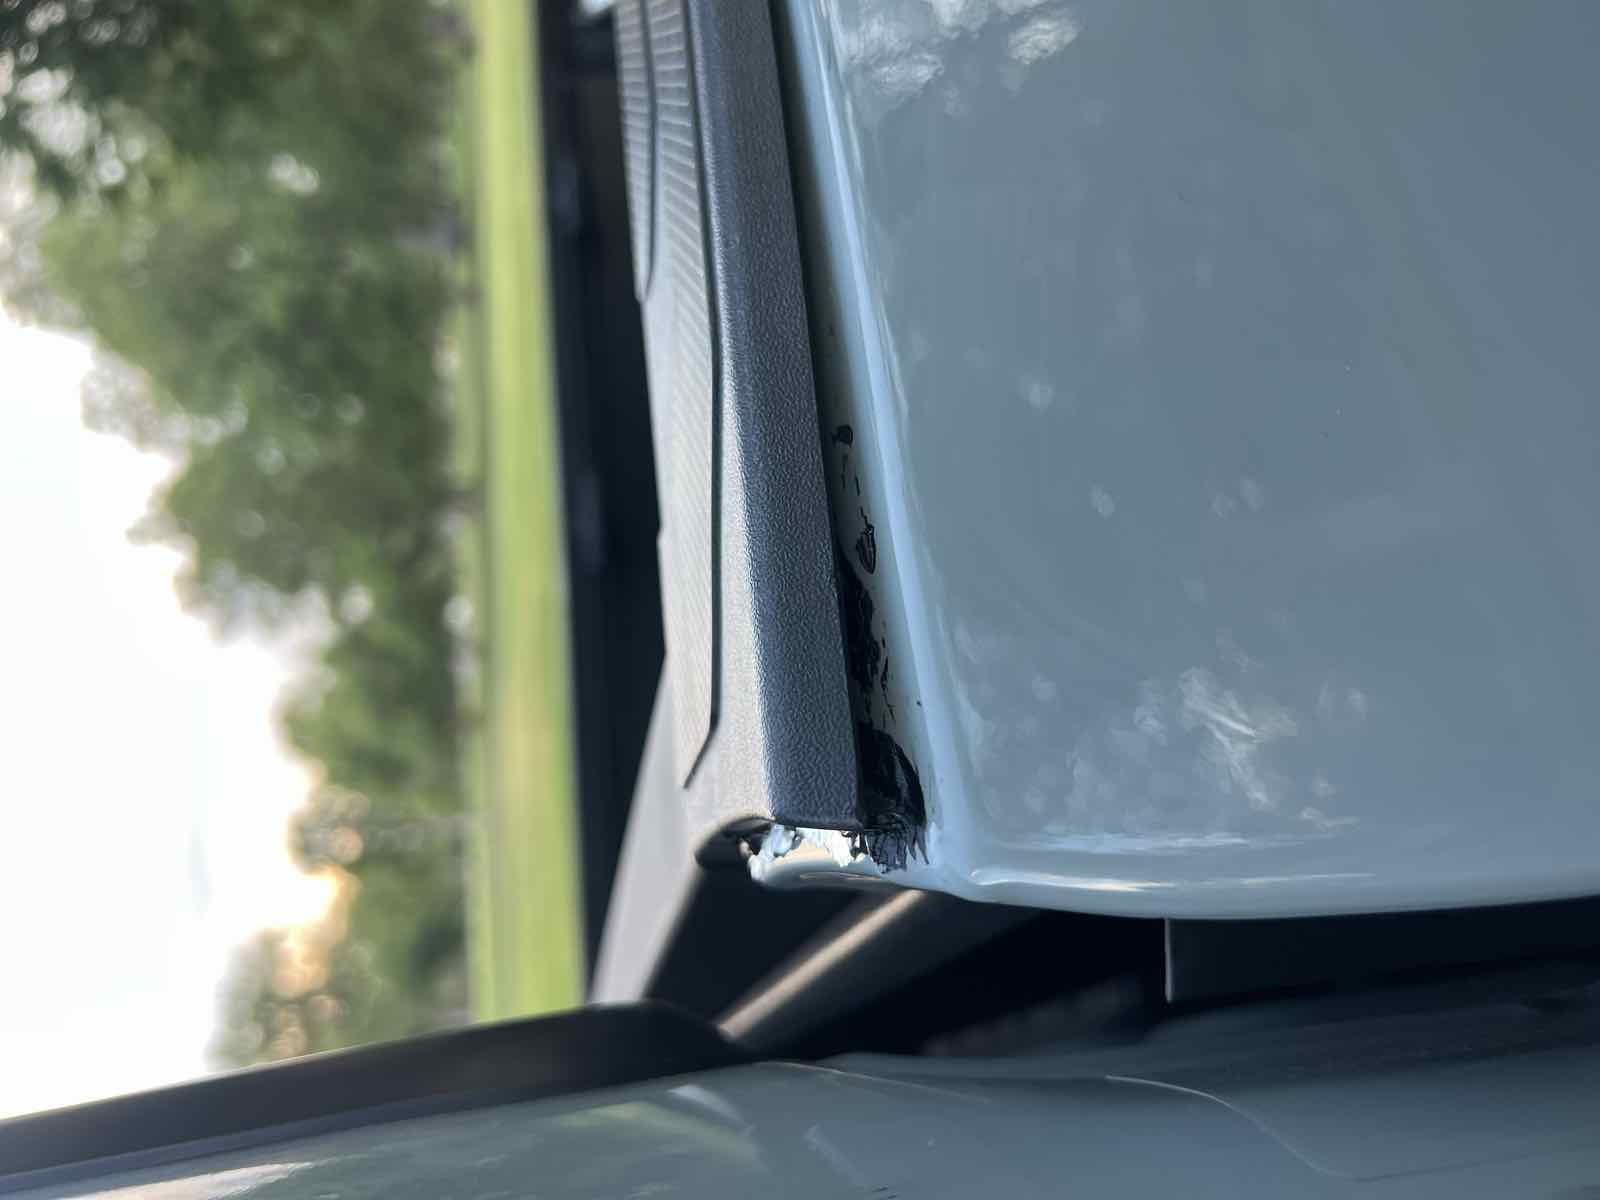
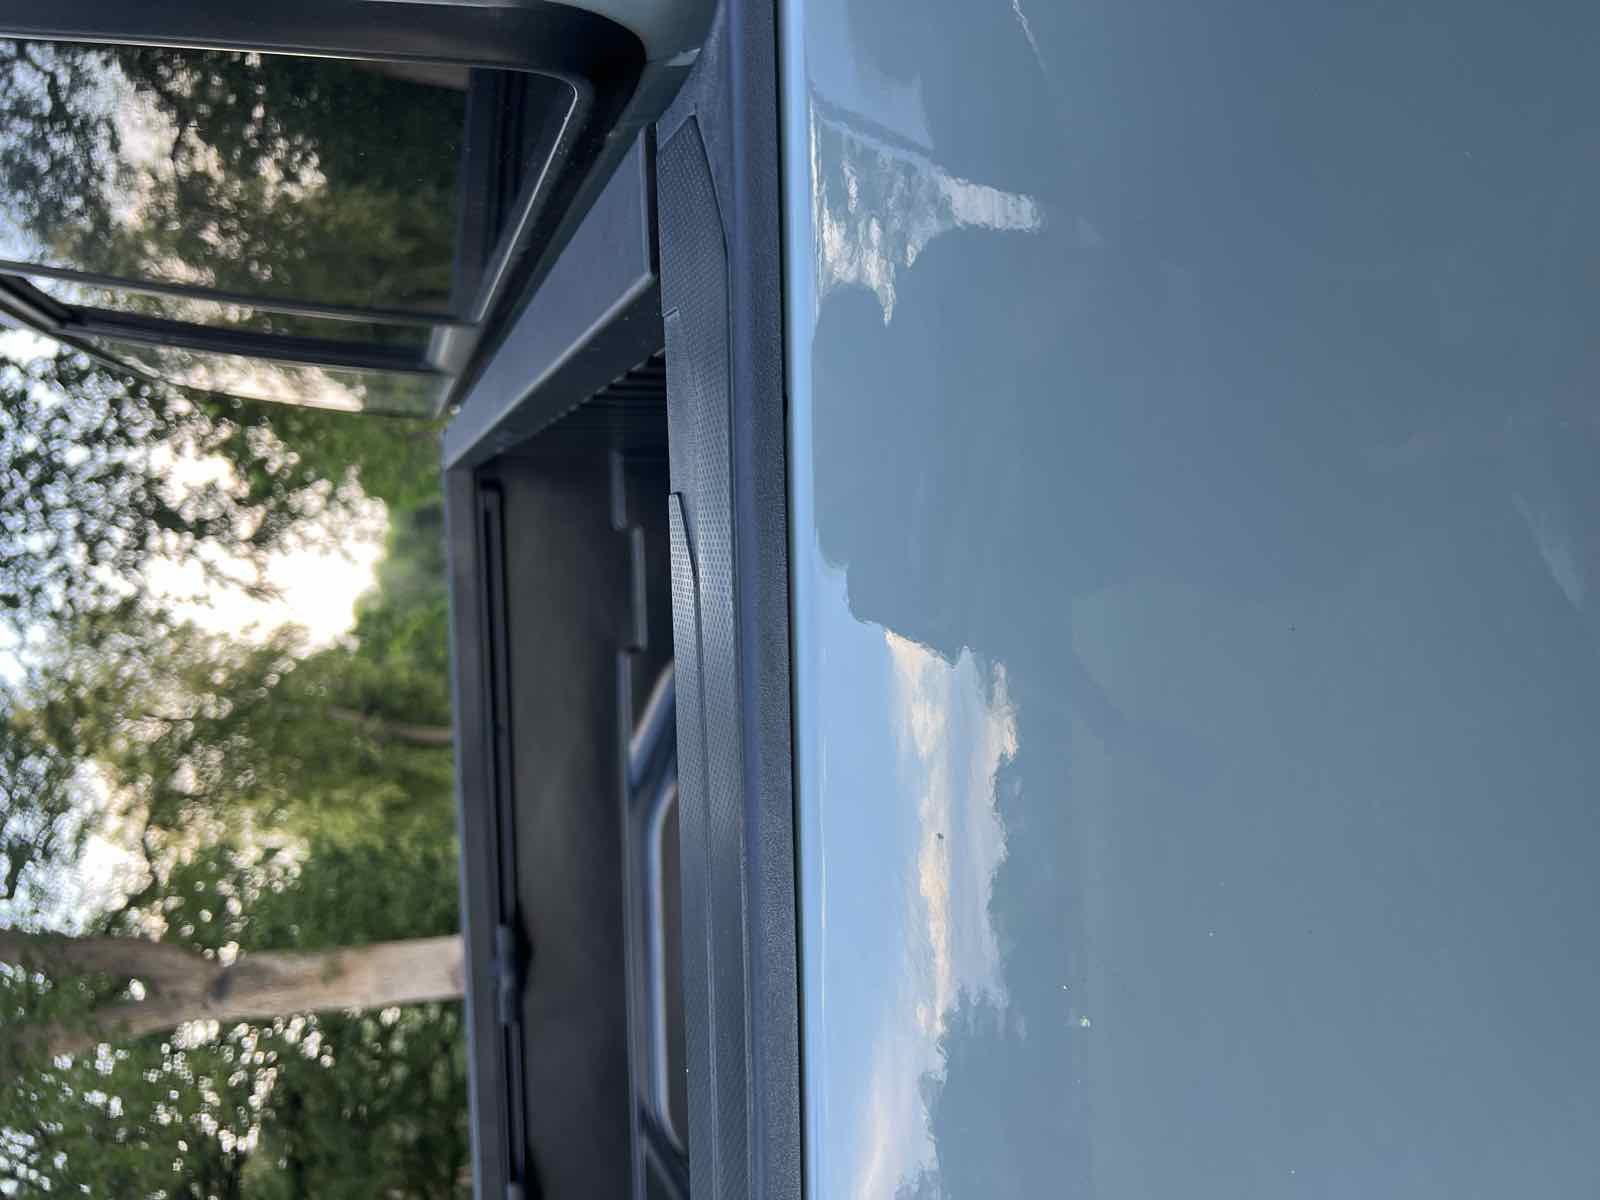
If you catch a proud cap while the Sikaflex is still curing (it firms up over about a day), press or clamp it back down. Once it's cured hard, leave it. Prying a set seal apart just wrecks the seal you came to make, and a slightly proud cap is cosmetic anyway, since the real seal is the tape and Sikaflex under the cap. Mine ended up close but not perfectly flush on the left side near the cab, and once the seal underneath checked out, I left it (see the end shots).
The Sikaflex warning nobody gives you
Cured Sikaflex has no easy solvent. This is the part I wish someone had told me. It's a polyurethane, not a silicone, so the usual stuff (mineral spirits, isopropyl) doesn't dissolve it once it sets, which takes about a day. There are a couple of specialized cured-polyurethane removers out there, but by the reviews they're slow and only so-so, so in practice you end up cutting or grinding it off, and that's where the paint gets wrecked. A sharp razor or boxcutter will slice it off a flat surface, but you're one slip from gouging the paint, and you still have a thin film to deal with after. Wet cleanup with isopropyl, before it skins, is the only easy window.
So prevention is the whole game. Mask every adjacent surface with painter's tape before you apply, and keep isopropyl and rags in reach for wet cleanup while you work.
Wear gloves. It stains skin and does not wash off. My hands looked terrible for three days, and dish soap plus a hard scrub barely touched it.
Use 221, not 252. 221 is the flexible sealant you want here. 252 is a structural adhesive for bonding parts, a different job entirely.
The front corners
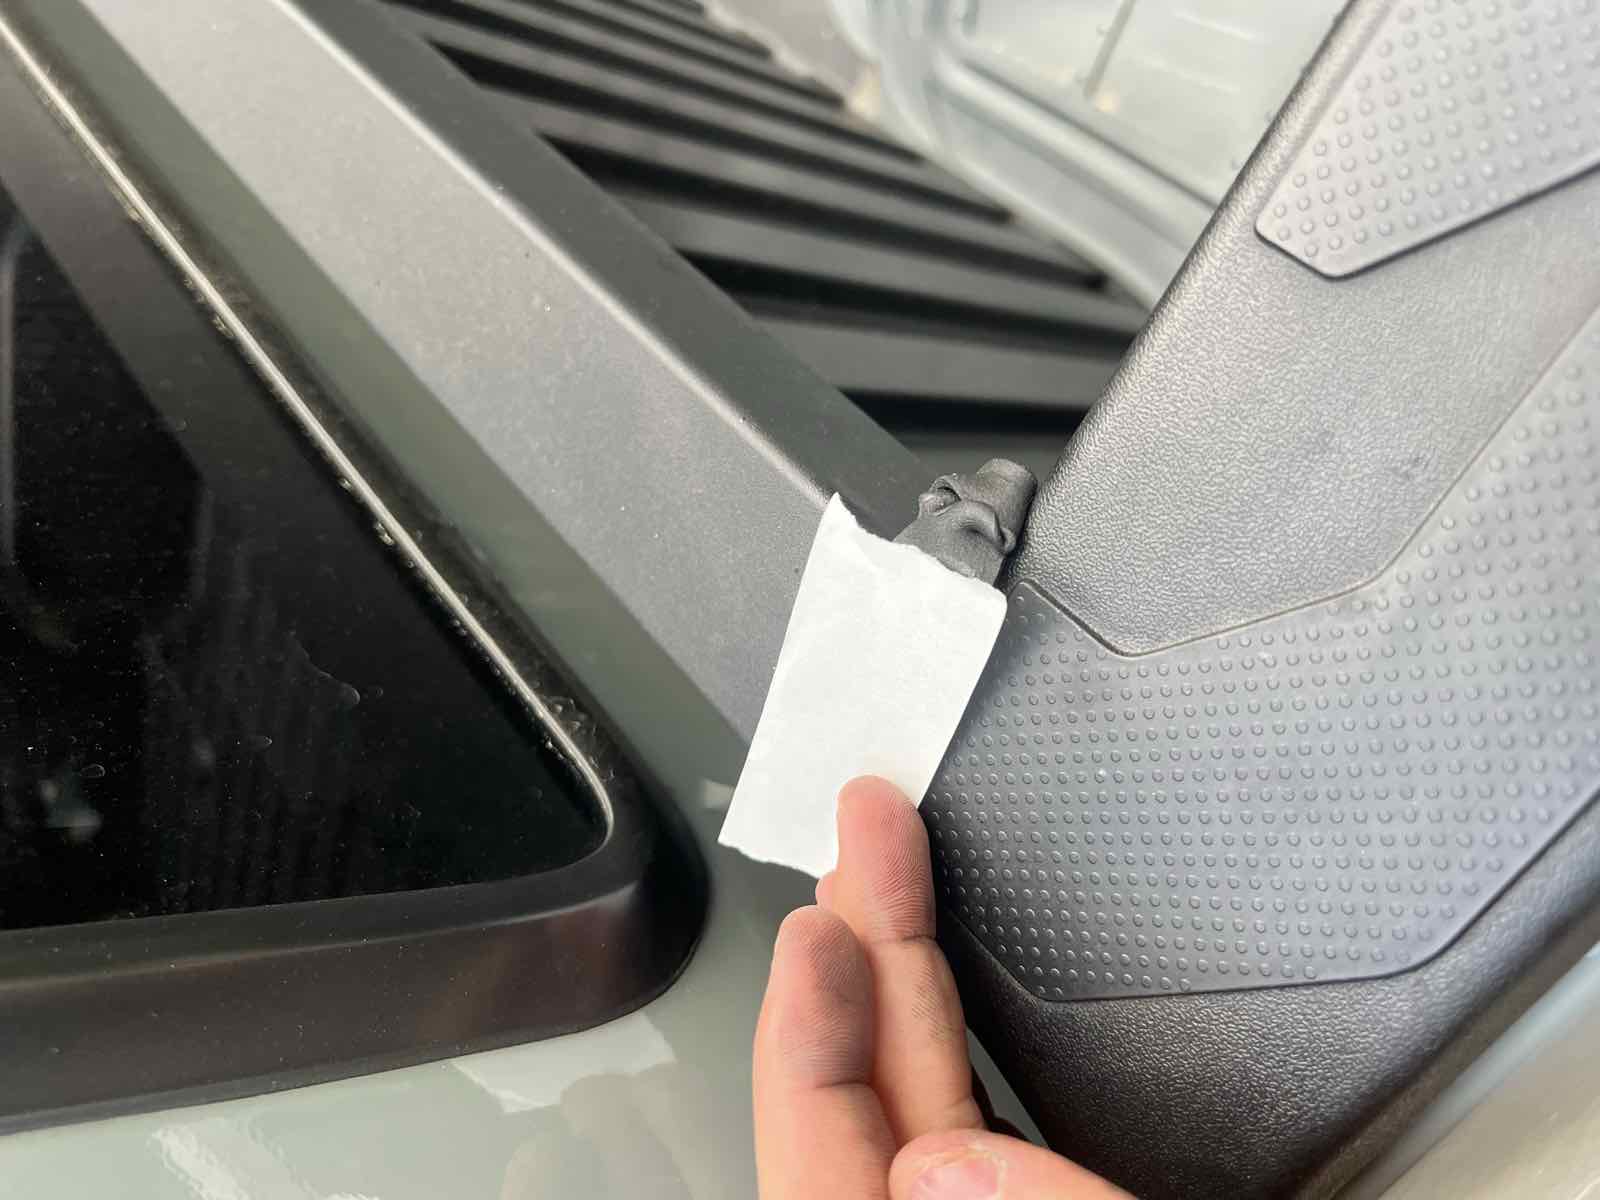
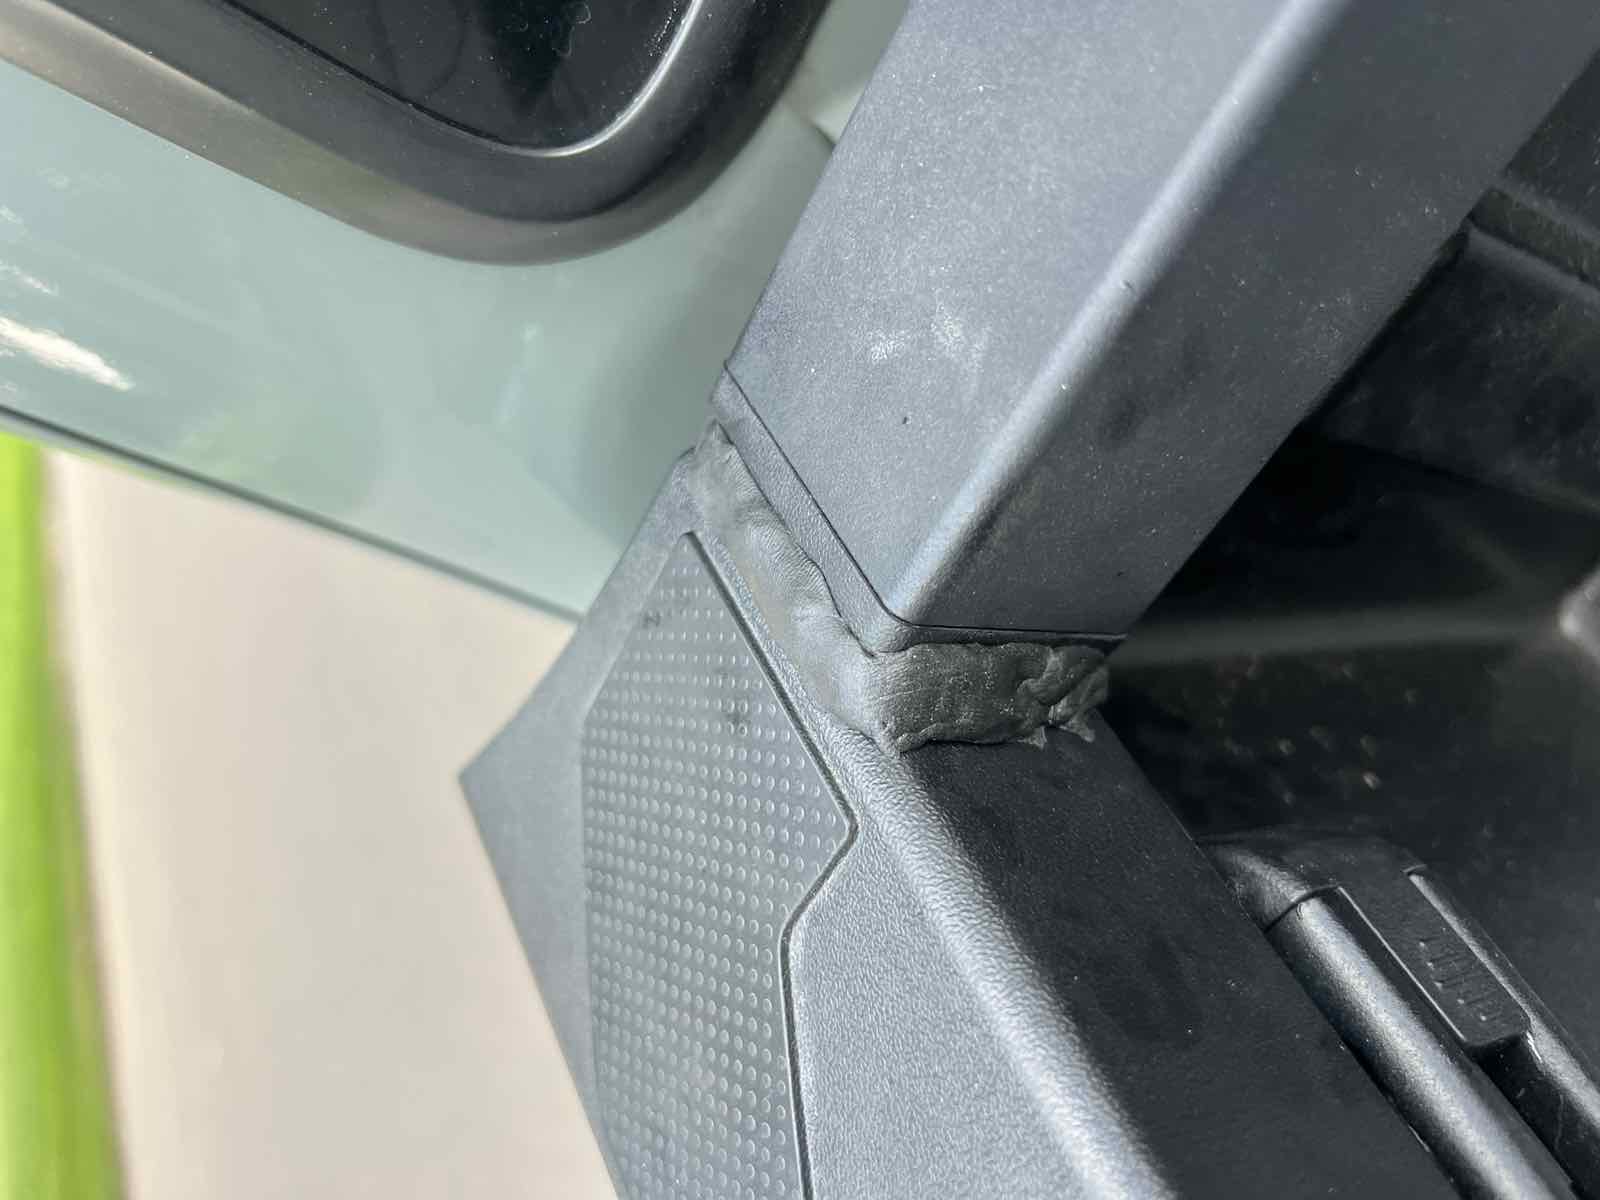
Butyl tape goes in the corner gaps where the front rail meets the sidewalls, up near the cab. There's an open pocket there that a bead of sealant can't bridge cleanly, so butyl fills it: cheap, flexible, and it stays put.
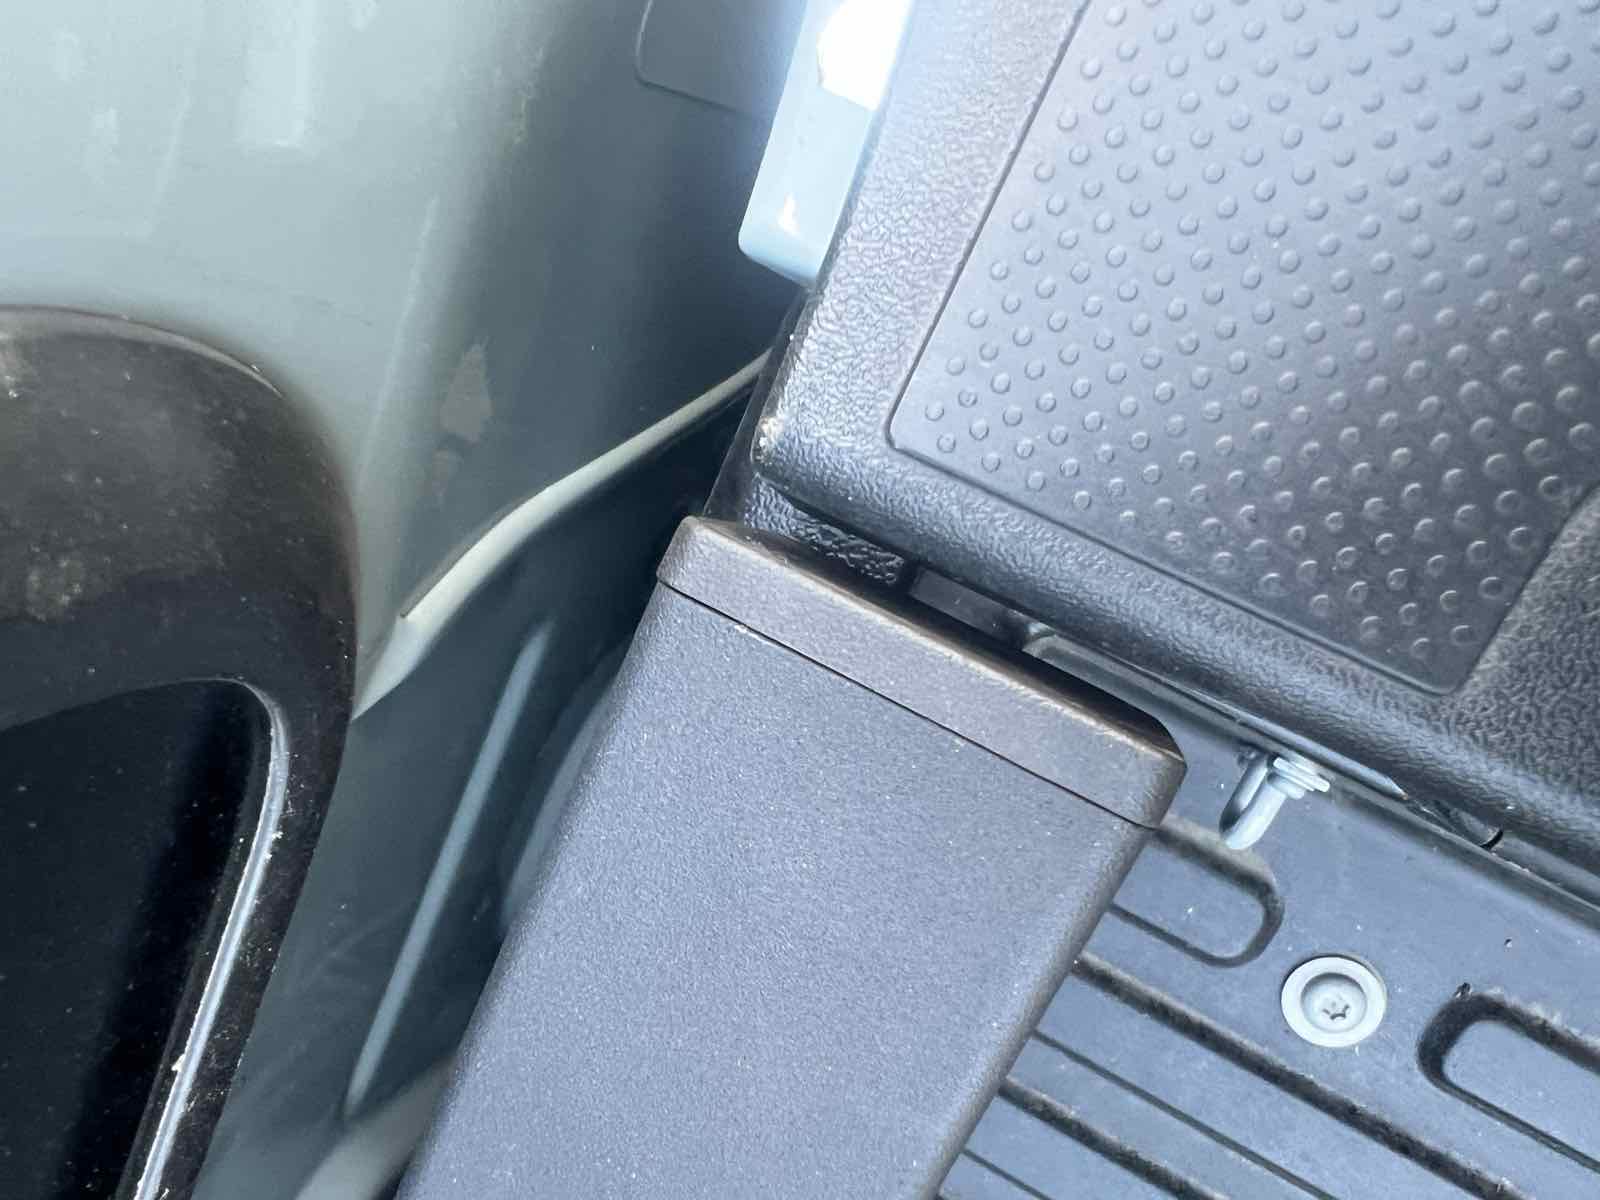
The trick that saved my fingers: press it in with the wax-paper backing the tape peels off of, so the butyl sticks to the truck and not to you.
The front is different on a 3rd gen (and it's the worst leak)
Most bed-seal guides show a front rail cap that pops off like the side ones. On a 3rd-gen Tacoma it doesn't. The front is a Torx-bolted rail threaded into captive nuts that are notorious for stripping. Don't unbolt it. You'll create a bigger problem than the one you're solving.
The real leak path up front is the corners (butyl), any visible seam (a thin bead of Sikaflex), and the cab-to-bed gap if you can see daylight through it. This matters more than the sides because water sheeting down the camper's cab-facing wall all concentrates right here.
The light test (the only real proof)
The only way to know your seal worked: wait for dark, sit in the bed with the tailgate closed, and have someone sweep a bright flashlight slowly around the outside. Anywhere light comes through, water and dust will too. Add tape or a dab of Sikaflex to those spots and test again until it reads dark. It's also how you judge the front, where there's no cap to hide behind.
The tailgate seal (and the mistake I made)
The tailgate gap is the number-one dust and water entry point, and a bottom gap cover alone doesn't solve it. I fitted the ESI ROK Block, shut the tailgate, and could still see daylight through the corners. It took ESI's sidewall taper seals on top of it to actually close things up. Both are manufacturer-direct at ExtrudedSolutions.com, and ESI sells them as one bundle.
Parking landmine: the bottom seal needs the tailgate left open about 24 hours to cure, and mine sat open for two days. If you park on the street or in a tight garage, figure out where the truck sits with the gate down before you commit the adhesive.
My mistake: ESI says install the sidewall taper seals first, then the ROK Block. I did it backwards, and it cost me almost nothing, because the ROK Block ends about two inches short of the sidewalls so the pieces butt rather than overlap. No sealant needed.
I wrote that whole job up separately, with photos of the daylight coming through before the sidewall seals went on: sealing the Tacoma tailgate gap.
Bed stiffeners (and a sourcing lesson)
The 3rd-gen Tacoma's composite bed can crack where the tailgate latches to the bedsides under sustained rail weight, and a permanent 400-pound camper is exactly that kind of load. Stiffeners are preventive insurance, not a fix. Honest version: owners are split, and I never found an M1 owner who actually cracked a bed. I fitted Total Chaos 48676 anyway, choosing them over the cheaper All-Pro set for low-profile clearance I couldn't add back later.
One sourcing lesson worth the paragraph. Total Chaos was on vacation when I ordered, and a big retailer's "in stock" turned out to be a drop-ship that wouldn't arrive before install day. Call and confirm the retailer physically warehouses the part before you count on it.
I wrote the whole job up separately, including the tools you actually need and the 10 ft-lb bolt I snapped: do you need bed stiffeners, and which ones I picked.
The order of operations
Sequence matters, because each step covers the last. Seal the bed rails first (foil, Sikaflex, butyl, light-test), then lay the bed liner, then drill and install the stiffeners (trimming the liner to fit), and last the camper goes on. The liner install is written up separately, including the surprise that it isn't actually a one-way door. The liner has to be down before you locate the stiffener holes. Rust-treating those holes is the common advice, though I skipped it on mine and explain why on the stiffener page. For the liner I ran the Husky Liners Guardian Comfort, which is the rebranded BedRug Classic, the same molded full liner Tune's interior kits index off.
The gotchas, in one place
- Thin bead of Sikaflex. Too much holds the caps proud.
- Mask adjacent surfaces before you apply, and wear gloves. Cured Sikaflex has no solvent.
- Wiggle the caps off; reinstall one clip at a time from the tailgate end, tapping home with a rubber mallet.
- The front "cap" isn't a cap on a 3rd gen. Don't unbolt it.
- Light-test everything at night before you call it done.
The shopping list (no Amazon)
- Sikaflex 221 (the flexible sealant, not 252) — hardware store
- Aluminum foil tape (I used Nashua) — hardware store
- Butyl seal tape (XFasten 3/4" × 30 ft) — specialty / hardware
- Caulk gun, 70% isopropyl alcohol, painter's tape, and gloves
- ESI ROK Block + sidewall taper seals — ExtrudedSolutions.com
- Total Chaos bed stiffeners (48676 for 2016–2023) — Poly Performance (call to confirm stock)
- Husky Liners Guardian Comfort full bed liner — huskyliners.com
My take
It's a weekend now against years of a dry, clean bed under a camper you can't easily lift back off. Get the Sikaflex thin, mask before you start, and wear the gloves. This is the rail-sealing chapter of bed prep; the tailgate seal and the bed stiffeners get their own writeups as I photograph them. If you're still working out what's going on the truck at all, run your setup through the payload calculator first, and here's the full breakdown of what I ordered and paid.